-
(노션에 있던 WIL을 가져오는 중입니다.)
Axios란?
Axios는 브라우저, Node.js를 위한 Promis API를 활용하는 HTTP 비동기 통신 라이브러리다.
쉽게 말하면 백엔드랑 프론트엔드랑 통신을 쉽게 하기 위해 사용한다.
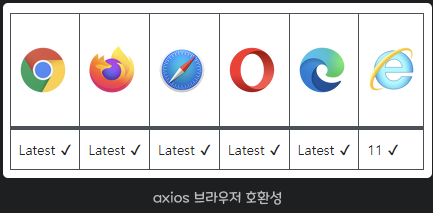
이미 자바스크립트에는 fetch api가 있지만, 프레임워크에서 ajax를 구현할 땐 axios를 쓴다.Axios 특징
- 운영 환경에 따라 브라우저의 XMLhttpRequest 객체 또는 Node.js의 HTTP API를 사용
- Promise(ES6) API 사용
- 요청과 응답 데이터의 변형
- HTTP 요청 취소
- HTTP 요청과 응답을 JSON 형태로 자동 변경
Axios 사용법
서버에 요청을 보낼 때
- url : 미리 약속한 주소로
- type : 어떤 요청을 보낸다
- data : 서버가 필요로 한 데이터를
- auth : 누가 요청했는지 알려준다 → 토큰을 전달해야 누가 요청했는지 서버가 알 수 있다
GET 요청을 보내는 법
// GET 요청 보내는법 //

import axios from 'axios';


axios.get('데이터를 요청할 URL')  // 데이터를 요청할 URL

----------------------------------------------------------------------------

<Button onClick={() => {

    axios.get('데이터를 요청할 URL')  // 데이터를 요청할 URL
    .then((result) => {           // 성공했을떄
      console.log(result.data);    // 성공했을떄 하고싶은 동작 입력
    })
    .catch(() => {                // 실패했을떄
      console.log("실패!")         // 실패했을때 하고싶은 동작 입력
    })

}}>GET</Button>

// 위와 같이 요청하면 object가 아닌 JSON 형태가 온다.
// 하지만 axios 라이브러리가 자체적으로 JSON 형태에서 object 형태로 다시 변경해준다.

----------------------------------------------------------------------------

// 만약 버튼을 누르는 행동이 아니라 페이지 로드시 데이터를 요청하고 싶다면?

useEffect( () => {
	axios.get('데이터를 요청할 URL')     // 데이터를 요청할 URL
    .then((result) => {            // 성공했을떄
      console.log(result.data);    // 성공했을떄 하고싶은 동작 입력
    })
    .catch(() => {                 // 실패했을떄
      console.log("실패!")          // 실패했을때 하고싶은 동작 입력
    })
}, [] );

// 위와 같이 useEffect에 넣어서 사용해준다. 끝에 대괄호를 해주지 않으면
// 업데이트 될때마다 실행되기 때문에 상황에 맞게 넣어주는 것이 좋다.
// 대괄호를 넣어준다면 실행될때 단 1번만 동작하고 그 이후에는 동작하지 않는다.(예외는 있음)
POST 요청을 보내는 법
import axios from "axios";

// axios는 axios.요청타입으로 요청을 보낼 수 있다 이 방식을 별칭 메서드라고 부른다
// 예시)
// axios.get(url, config)
// axios.post(url, data, config)

// 어떤 요청을 보낼 지, 별칭 메서드 사용
axios.post('/cat', // 미리 약속한 주소
	{name: 'perl', status: 'cute'}, // 서버가 필요로 하는 데이터를 넘겨주고,
	{headers: { 'Authorization': '내 토큰 보내주기' },} // 누가 요청했는 지 알려준다. (config에서 사용)
).then(function (response) {
    console.log(response);
  })
  .catch(function (error) {
    console.log(error);
  });
Axios 전역 사용
- Axios base 설정
import axios from "axios"; ... const instance = axios.create({ baseURL: "요청보낼 서버에 base주소를 쓴다" }); // 인터셉터를 사용하여 요청을 보내기 전에 같은 요청이 가진 않았나 확인한다거나 // 요청에 실패하면 잽싸게 가로채서 재요청을 보낼수도 있다 instance.interceptors.request.use(function (config) { const accessToken = document.cookie.split("=")[1]; // 서버와 형식을 맞춰 모든 요청 헤더에 토큰을 넣는다 config.headers.common["Authorization"] = `Bearer ${accessToken}`; return config; }); export default instance; ```- Axios 기능별 묶음
export const apis = { // 로그인 POST login: (username, password) => instance.post("/user/login", { username: username, password: password }), // 회원가입 POST signup: (username, password, passwordcheck) => instance.post("/user/join", { username: username, password: password, passwordcheck: passwordcheck, }), // 메인 페이지 GET mainGet: () => instance.get("/api/main"), //POST작성 POST postWrite: (title, imagelist, category, price, content) => instance.post("/api/post", { title: title, imagelist: imagelist, category: category, price: price, content: content, }), // POST수정 PUT postEdit: (title, imagelist, category, price, content, postId) => instance.put(`/api/post/${postId}`, { title: title, imagelist: imagelist, category: category, price: price, content: content, }), // POST삭제 DELETE postDelete: (postId) => instance.delete(`/api/post/${postId}`),- 기능별 Axios 사용하기
const loginUser = (id, pwd) => { return function (dispatch, getState, { history }) { apis .login(id, pwd) .then((response) => {'TIL' 카테고리의 다른 글
WebSoket (0) 2022.06.12 다중 이미지 기능 구현 (React,Redux) (0) 2022.06.12 리액트 DOM,서버리스 (0) 2022.06.06 Java Script의 매게 변수 간략 개념 정리 (0) 2022.06.03 Java Script ES5,6 차이 (0) 2022.06.01